Subtitling or closed captioning your video is useful for a variety of reasons these days. In addition to making your videos accessible to users with hearing impairments, adding captions to your video can also make it more likely to be watched by mobile users who are watching videos in public spaces where they don’t want to play a video with sound (or viewers who are less likely to watch a video for sound for other reasons).
Premiere Pro, one of the most popular cross-platform video editing programs today, offers a few different options for subtitling videos. In this article we’ll explain how to add subtitles or captions for a video using Premiere Pro on your Mac or PC. We’ll go over a few different methods to add subtitles in Premiere Pro.
Option 1: How to manually add subtitles to a video in Adobe Premiere Pro using the Title Tool
The most basic way to add subtitles to a video in Premiere Pro is to use the same Title Tool that you may have already used to create titles in a video. Here’s how it works:
1. In Premiere Pro, set up a sequence and place your video inside it (if you’ve already been editing, just make a duplicate version of your sequence so you have a backed up copy of it using the right click or control click… Duplicate option).
2. Use the text tool or press the letter T on your keyboard to get a cursor. Click where on the video you’d like to place the video and type out the text, just like you would for a normal title.
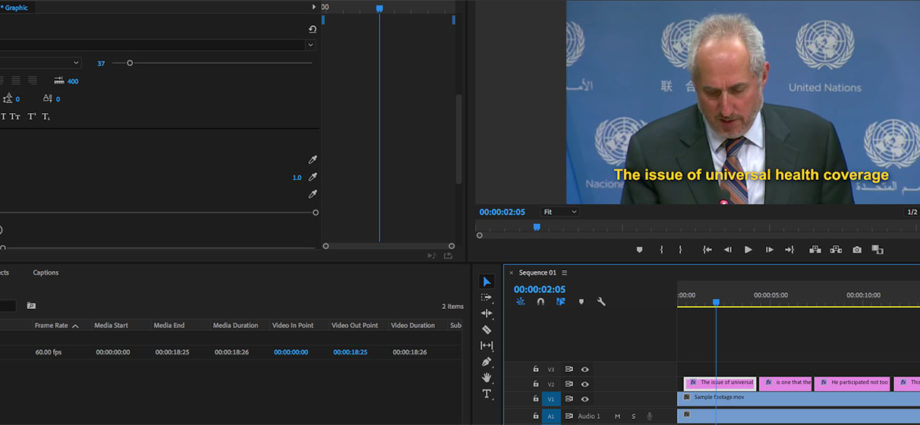
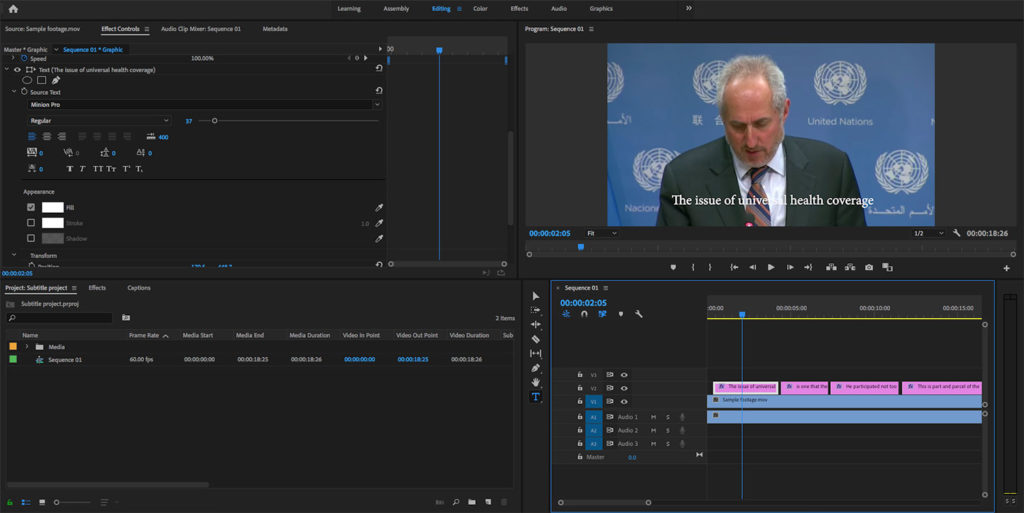
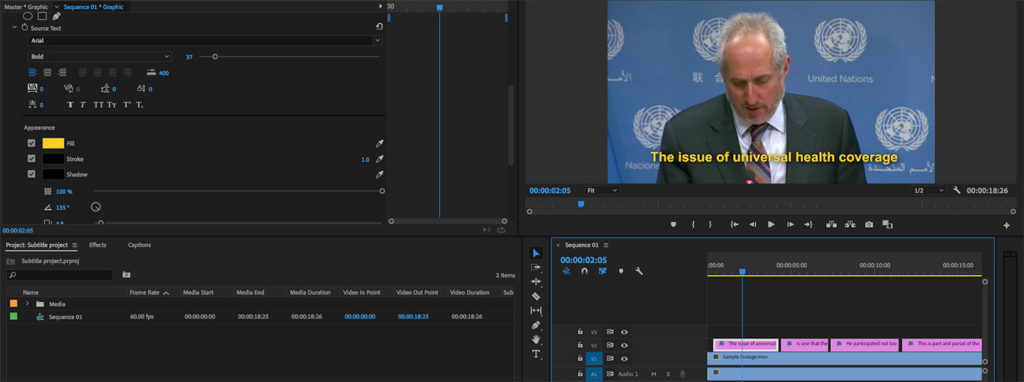
3. Double click on the title (subtitle) in your timeline and open up the Effect Controls tab (Shift+5 or Window… Effect Controls from the menu bar). From there, scroll down to the text options where you can adjust the font, color, size, stroke, drop shadow and other parameters to make your text more readable.
The next subtitle you create will also have these same attributes (you can also duplicate your subtitle in the timeline by pressing the Alt key on your keyboard, and dragging a copy over on your timeline if you wish to keep the exact text alignment intact).
Pros of this approach: You can customize just about every element of how your subtitles look using the Title Tool in Premiere Pro. Color, size, placement: it’s all up to you. And if you’re already familiar with using the Title Tool, this won’t be a new tool to learn how to use.
Cons of this approach: You’ll have to be pretty careful to make sure that each subtitle is placed in the same exact spot on the screen for consistency’s sake. And also you don’t have any option to import subtitles generated elsewhere with the Title Tool.
Option 2: How to add closed captions using Premiere Pro’s Captioning Tool
What is the difference between making subtitles using the Title Tool, and making captions using Premiere Pro’s official Captions option? Partly it’s how the text looks, and also partly how it function. Here is the subtitle tool on the left, and the caption tool being used on the right. (Both tools can look slightly different using their customization options, but these are examples.)

As you can see, the caption option allows you to put a black rectangle (with a user-selectable transparency level) behind your text for legibility. The normal Title Tool option gives you the choice to add drop shadows instead. Both options allow you to change the size, font, font color, and add a stroke outline around the text to improve legibility.
The other big difference in how these tools are set up is that the Captions tool is designed specifically for captioning or subtitling a continuous stream of video, rather than being for one-off titles like the Title Tool.
Here’s how to use Premiere Pro’s Captions tool:
1. Go to File… New… Captions. For the Standard, select Open Captions (which will allow you to determine the font options etc – closed captions are the television standard). Hit OK.
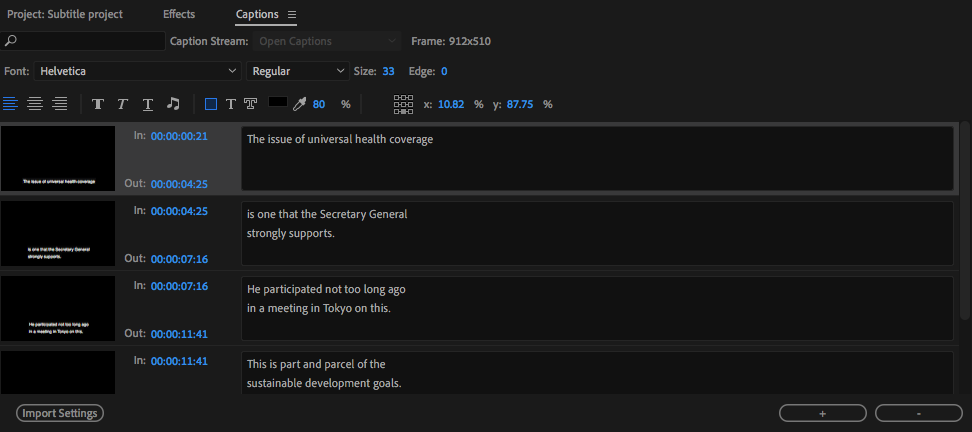
2. Drag that newly created Caption file on to one of your video tracks in the sequence containing your video. Next, double click on the sample caption it provides to open the Captions setting box. From there you can adjust font size, placement, color, etc, as well as length and timing. To create a second caption, simply hit the + button at the bottom of the captions window. You can also adjust the timing of a caption by dragging either end of it out in the timeline.
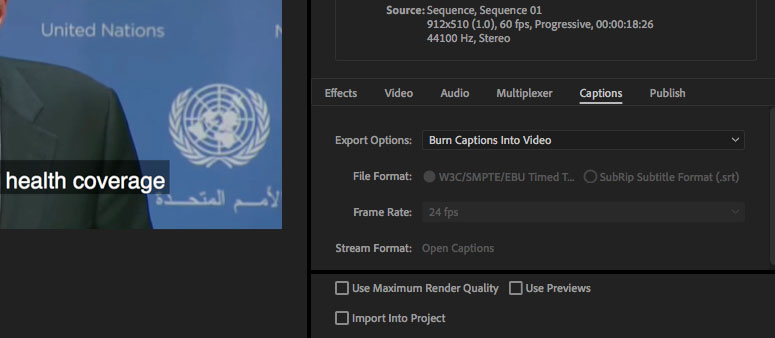
3. When it’s time to export your video, go to the Captions tab of the Export screen and choose the Export Option: Burn Captions Into Video. Otherwise, the captions won’t actually be exported in your final file.
Pros of this approach: It’s designed for captions so you can add a nice black box (of your own opacity choice) for legibility. Plus, since the tool is designed for subtitles, it has more features to automatically lock in title placement and so forth that the normal Title Tool doesn’t have.
Cons of this approach: There are occasionally bugs in the Captions tool since it’s newer than the Title Tool. Additionally, it can be time consuming to manually input all these captions and make sure their placement is perfect (especially if you have to add subtitles to a long video). Which is a problem that is solved by the next option:
Option 3: Use a cheap and fast third party captioning service to generate a captions file, then import it into Premiere Pro for burning the captions into the video
If you’ve got a long video (or even if you have a short video but don’t want to spend the time manually typing out the captions and placing them perfectly), you could use a third party captioning tool to spit out a timed transcript and then import that into Adobe PPro using its Captions tool.
Here’s how it works: A service like Rev.com can generate English captions for as little as $1/minute so a 5 minute video would cost you only $5 which is a pretty affordable rate.
Here’s how to use Rev subtitles with Premiere Pro:
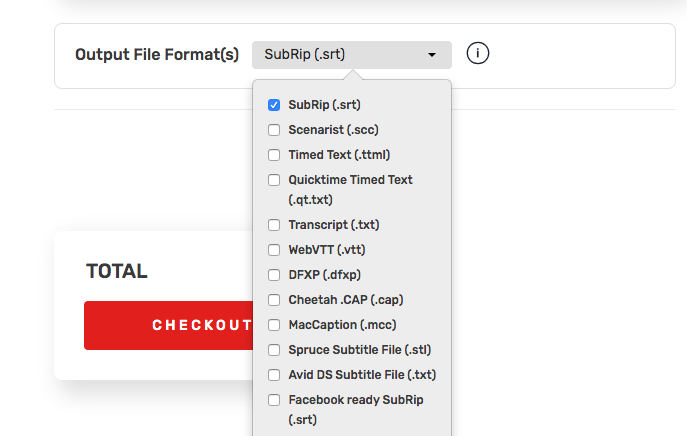
1. Go to Rev.com and choose the Captions option. Upload your video (as an .mov, .mp4 or whatever file format you have) and enter your payment information. For caption format choice, choose .SRT:
2. Ater Rev emails you the subtitle file (which could take a few hours or as much as a day), import the .SRT file into Premiere Pro and drag it on top of your video in your sequence, just as you would with a Caption file. You may have to adjust the timing of the first title by dragging the full captions track over a bit, but the rest of the captions should stay synced as long as you’re moving them all together.
If you would like to change the text size, etc of all your captions at once, simply go to the Captions window and select the first caption, hold down the Shift button, and scroll to the last caption and click to select it. This should select all your captions at once, and you can now adjust the font parameters and so forth.
3. When it’s time to export your video, go to the Captions tab of the Export screen and choose the Export Option: Burn Captions Into Video. Otherwise, the captions won’t actually be exported in your final file.
Pros of this approach: Extremely efficient if you have a long video you need captioned. Reduces the amount of manual work you need to do. Also has translation options for foreign language subtitling.
Cons of this approach: Costs money (an hourlong video will cost $60 at the $1/minute caption rate for English captions).
Frequently asked questions about making captions or subtitles in Premiere Pro
How does Rev work? Rev is a captioning and subtitle service that does a first pass using advanced speech to text transcription software which is then cleaned up by humans who correct errors and add punctuation as needed. You still may need to make some corrections (especially if the people speaking in your video are mentioning specialized terms or unusually spelled names), but generally Rev works as a great first pass.
If you’re importing subtitles or captions from Rev into Premier Pro, you’ll still want to watch your video with imported subtitles as a quality control pass at the very least and to double check the timing of various titles (plus to make sure the captions don’t conflict with any on-screen elements).
How do I move caption placement so it doesn’t conflict with something important happening at the bottom of the frame? In the Captions window you can select from 9 pre-defined “title safe” placements for your captions.

Can you add a drop shadow using the captions tool? Currently, as of the time of this article is published, the closest you can get to a drop shadow is adding a dark colored stroke around the edge of your text. Of course, Premiere Pro is updated several times a year and there’s no reason Adobe couldn’t add this feature later on.
See also:
10 Ways to Make Subtitle Styles More Readable
How to get audio/video transcribed – speech recognition & manual transcription programs
What does a documentary script look like? How to write a script for a documentary film